
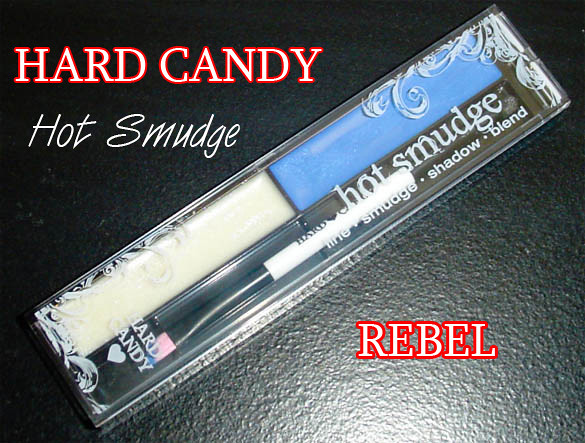
At first glance its hard to miss how much these look like the Urban Decay Ink For Eyes Eyeliners. But I'm gonna throw this out there right away - I like these better than Ink For Eyes.
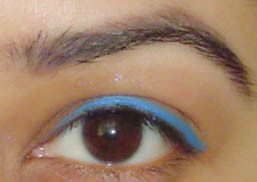
For starters the Hard Candy Hot Smudge comes with two shades and only costs $6. I tried Rebel - a bright blue and a clear primer with hint of sparkles. The brush that comes with the product is all I use. It is great to draw even a very thin line. The liner itself has a creamy texture but not very ultra creamy like Ink For Eyes. Those ultra creamy ones smudge and are not good for liner purposes. But this one works perfectly well as a liner and as a base for shadows.
They didn't smudge or touch my crease like the Urban Decay ones did. This is good stuff , man.
Overall for $6 this is so worth trying. Plus they are sold at Walmart - if you don't like the shade you tried you simply return it with the receipt. But take it from me - chances are you will only be going back to get more !
Love,
Indian Girl

Eye Makeup For Beginners : Chapter 3 - The Inner Corner
When I started out with wearing eye makeup there was one tiny little thing I always did - highlight the inner corner of my eye. I used to use NYC eyeliner pencil duo which had a gold shade on one end and black on the other end. A hint of that gold on my inner corner always got me compliments. And for someone starting out in makeup that gave me a lot of confidence and told me I wasn't doing it all wrong !
This is a look that progresses in five steps. We start out with the gold on the inner corner and work our way from there ! Each stage is / was a complete look on its own for me and you will love how easy it really is !
Given my tan skin (NC40) I love using gold. But if you have ...
Very fair / light skin tone try - champagne/ silver/ pearly white / pale gold
and
Medium / Dark Skin Tone try - Gold / Bronze / Honey Gold.
These are easy choices AKA blanket statement. Use anything that makes your eyes pop and makes you feel better.
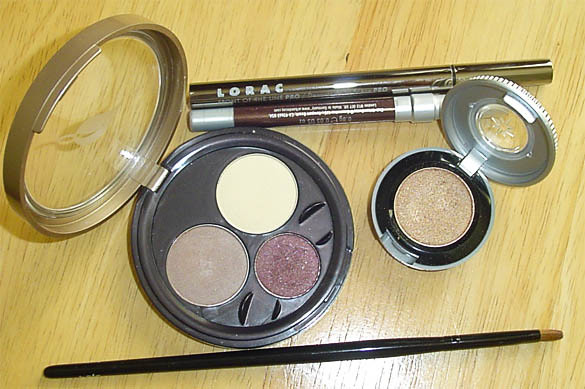
PRODUCTS USED :
STEP BY STEP TUTORIAL
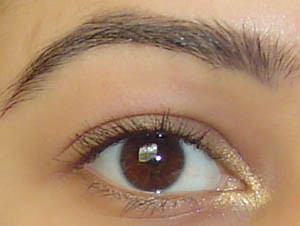
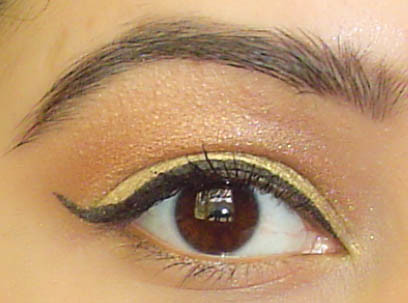
STAGE 1 : A clean set of brows, some mascara and gold on the inner corner.
Here I used a gold shadow ( Urban Decay - Half Baked ) and a small flat shadow brush to apply it. A gold pencil like the one from NYC will make this all the more easier.
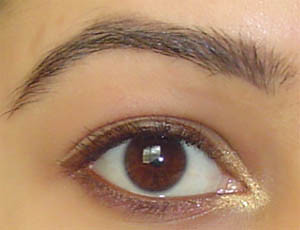
STAGE 2 : A little liquid eyeliner along the upper lash line.
I used brown LORAC eyeliner. But black will look just as great. A favorite drugstore liquid eyeliner of mine is the one from Prestige Cosmetics.
STAGE 3 : Run a pencil eyeliner along the lower lash line.
I used brown ( Urban Decay - Bourbon) just to keep it uniform.
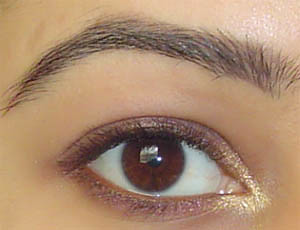
STAGE 4 : Use a plum brown shadow along the lower lash line softly lining it. I generally start from the outer corner moving inwards, so the shade fades as it moves towards the inner corner.
I've used the plum brown shade form Sally Hansen Natural Beauty Shadow Trio - The Stone Eye Palette
STAGE 5 : Apply the same shadow along the upper lash line.
That's it there you have it - a perfectly good beginners look in five easy steps. But the best part - you can stop at any stage just add some mascara, do your brows and you are good to go !


Lemme know if these tidbits are helping you. Its fun sharing my personal journey through the world of beauty !
Love,
Indian Girl
CoverGirl Smoky Shadow Blast Shadow Stick : Review & Swatches
Hiya Ladies !
Happy Monday ! How was the week end ??
Better than mine I hope !
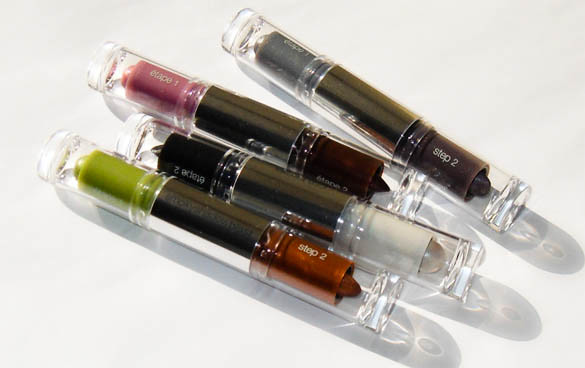
Gettin on with beauty bidness - lets talk CoverGirl Shadow Blast Sticks. Its hard to resist these bright shades walking down the aisles of CVS. The orange/ bronze. green silver all beg to be bought and worn. And the ads for these only make one want them even more !
Each stick comes with two shades - one an eyeliner/crease shade and the other an all over lid shade. Nice concept and totally works if it weren't for the creasing. But then you already knew that. When I see creamy shadows the first thing I care about is creasing - no matter how adorable the color everything is ruined when I have goopy eyeshadow.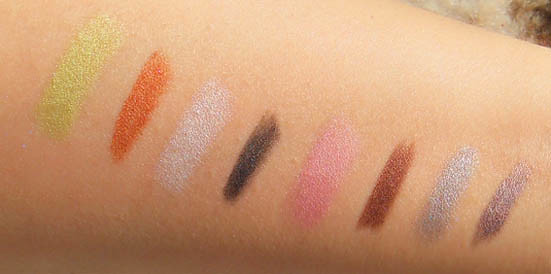
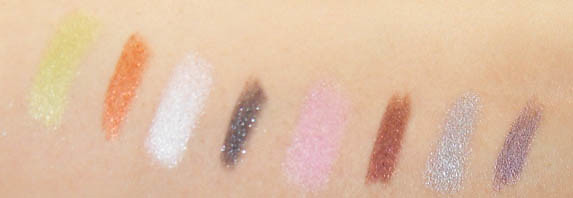
Another thing is to use them as eyeliners - this is what I've been doing. The coppery shade that comes with the green is too cute with brown eyes. The sparkly black is great too ! But my super favorite is the one on the far right - the purple taupe. So so so very gorgeous. Given that they are so creamy / waxy they don't stay long on waterline but along the lash line they make for a good option.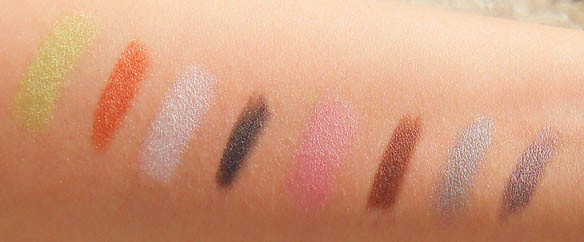
Have you tried the CG Smoky Shadow Blasts ? You likey ? Is there a better way to wear them ?
Love,
Indian Girl
This article contains a sample product sent for consideration by PR. For more details on the disclosure policy please refer to it at the bottom of the page.
Bodyography Cosmetics Eyeshadows : Review & Swatches , Chanel Paris Shanghai Collection Inspired Eye Makeup Look
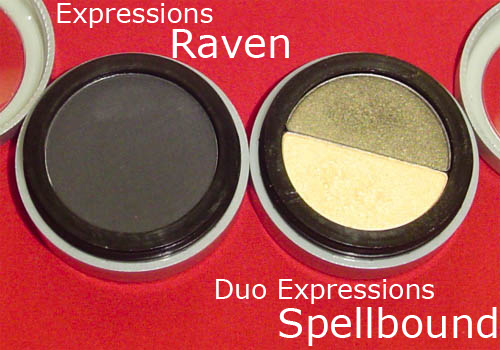
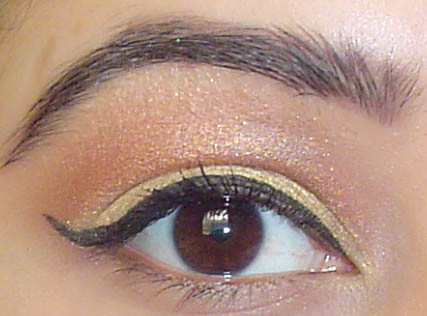
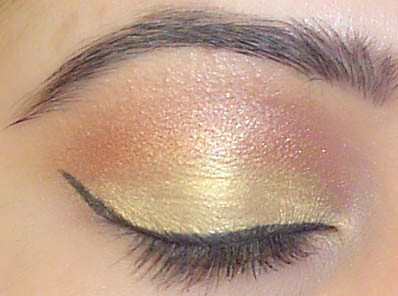
I recently tried a couple of eye shadows from Bodyography Professional Cosmetics. I am new to the brand but have seen it in mentioned in the past in several magazines like Allure & Instyle. To put them to test at AIMB I did this look inspired from Chanel Shanghai Paris Makeup Collection.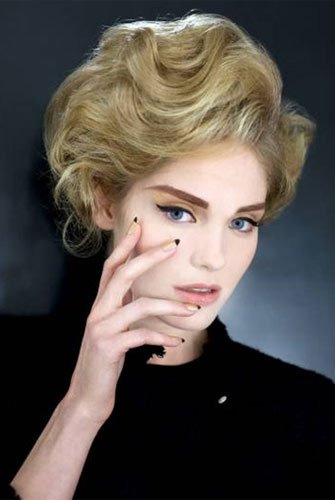
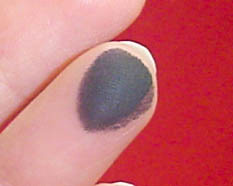
At first swatch I thought the shadows were a bit crumbly but when I applied them over a thin layer of primer or a creme shadow, there pretty much was zero fallout. For this look I applied them over a thin layer of Illamasqua Liquid Metal. I'd strongly recommend something under the shadows so they stick better.
The shades are intense with a couple of layers. A single layer gives a soft look - may be something for these bright hot days on pale skin tones. Medium / dark skin tones will need a couple if swipes.
The other shade I tried was Raven - a matte black. Very pigmented and very nice matte texture. Almost all blacks I have are shimmery ones so I'm looking forward to doing a serious matte black smokey eye !
My big gripe is with the prices - a whooping $18 for duo expressions and $16 for expressions ! The packaging is sturdy and I like the silver pans with screw tops but if they were a bit more cheaper I'd love to check out more products from this line.
Chanel Paris Shanghai Collection Inspired Eye Makeup Look
Now onto the look. Lemme know if you'd like a tutorial ! I'll be happy to give out the deets !
Indian Girl
This article contains a sample product sent for consideration by PR. For more details on the disclosure policy please refer to it at the bottom of the page.



Sally Hansen Natural Beauty Color Perfect Lip Color - Sun Beam : Review & Swatches
What a mouthful.
I just call it Carmindy Lipsticks.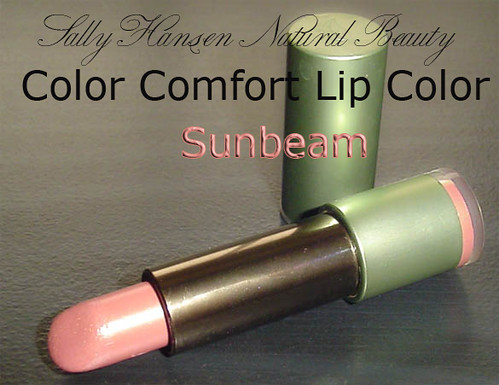
I've been wearing this almost everyday since I laid my hands on it. Its the one I go to when I dont wanna think about what to wear. The last time I was this crazy about a shade , it was Clinique Butter Shine Lipstick - Baby Baby.
This shade, Sunbeam, was specifically recommended for summer by Carmindy herself to get a luminous natural look ! Its the perfect lipstick if that's the look you are going for. Say Aishwarya Rai at the French Open - looking so natural yet & pretty. with the soft makeup. That's exactly what this shade does to me.
Have you tried any lipsticks from this range ? If not - you must give it a go. Keep the receipt handy if the shade doesn't work out for your skin tone :)
Indian Girl


Zoe Saldana - Red Lip Look
Oh Zoe Saldana, how gorgeous are thee...
Love the milkmaid braid , the cool dangly earrings and the red hot lips !
For a similar red lip look try Smashbox Double Take Lip Color Pencil - Cranberry.
Love,
Indian Girl


Jennifer Hudson's Luminous Makeup Look : How To ?
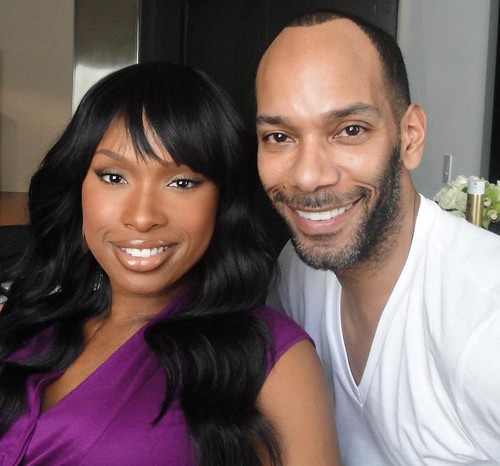
The ever beautiful and recently slimmed down Jennifer Hudson recently got together with Sam Fine, celebrity makeup artist and creator of The Basics of Beauty, for a shoot showing off her gorgeous new look. Here, Sam shares his insider advice on how you can achieve this flawless and glowing face at home with just a few easy steps.
Coverage: Every great look begins great coverage. Jennifer has beautiful skin, but like many women of color, she has varied tones. I use foundation to unify those varying tones. One of my favorites is the Queen Collection Natural Hue Compact Foundation because it’s cream- to- powder, so it dries down to a powdery finish and looks really natural.
Bronzer: Bronzer is always a must for all women to illuminate their complexion. It’s important to choose a bronzer that’s one shade darker than your natural skin tone and apply it to the outer perimeter of your face to warm the skin and create a halo of glow. After applying bronzer, you can go back and layer over blush to give the skin a pop of color. On Jennifer, I used CoverGirl Natural Hue Mineral Bronzer and Cargo’s matte blush in Laguna.
Eyes: To create Jennifer’s classic, natural eye, I used a brown shadow. Shu Uemura makes a great pressed eye shadow in an array of shades – in this case, their Matte Taupe with Golden Flakes Eyeshadow works perfectly.
For this look, I didn’t use a ton of liner, and totally avoided lining underneath her eyes to keep them soft. We used tons of mascara to enhance her look – my favorite is LashBlast from CoverGirl. I always like to apply a coat of mascara, and then move on to something else to let the first coat dry. I’ll come back a few minutes later, curl the lashes, and then layer on a few more coats of mascara to really build the lashes. This makes them much more dramatic and makes the curl hold well. It’s like spraying your hair with a coat of hairspray before using a curling iron.
Lips: To complete her look, I gave Jennifer a beautiful nude lip. The key to a nude lip is to begin by lining the lips with liner that is one shade darker than your natural lip color. Don’t worry about matching the liner to your lipstick – if you match it to your lips, it will look great with any shade of lipstick. After lining the lips, feather the liner towards the center of the mouth to great a base for the lipstick. Next, apply your lipstick.
On Jennifer, I chose IMAN Cosmetics’ Luxury Moisturizing Lipstick in Citron. I finished by slicking on a golden gloss add dimension and shine. CoverGIRL’s Shine Blast Lip Gloss is perfect!
Love,
Indian Girl
Feeds

get latest updates on news and subscribes to our feeds
